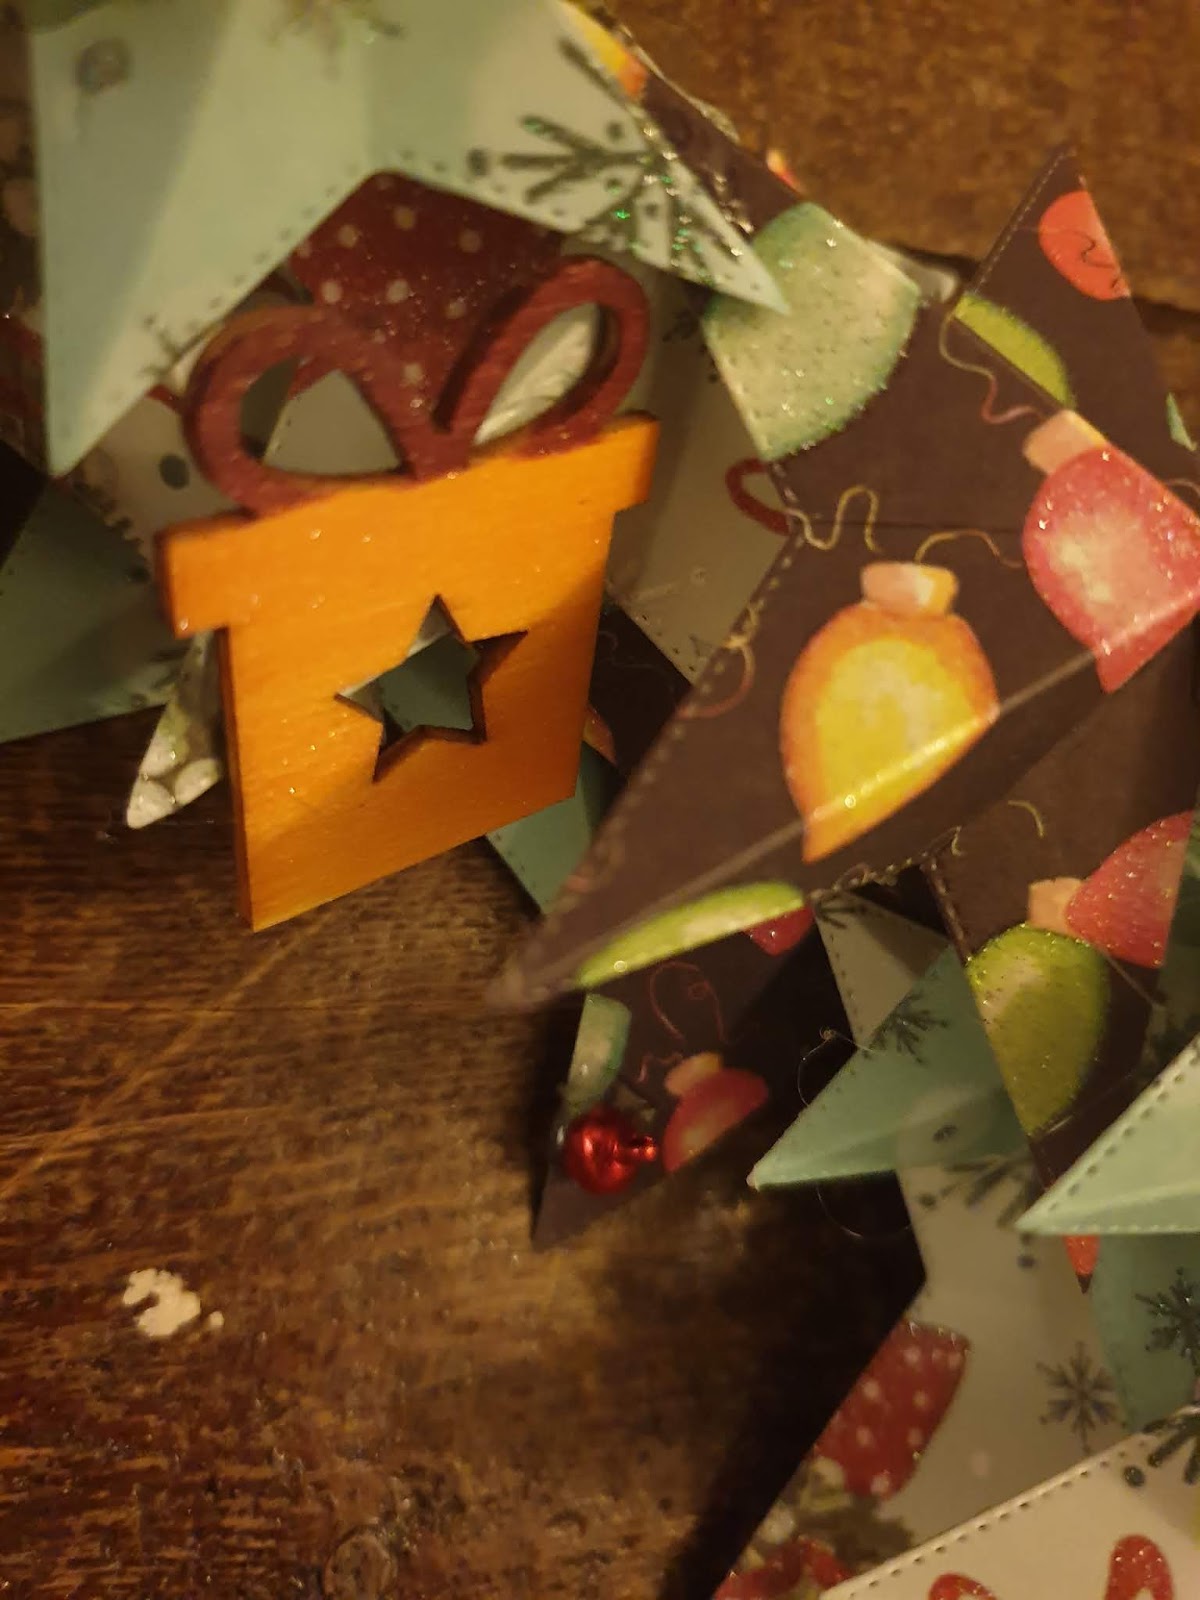
Tuesday, 26 November 2019

Christmas Star Wreath.


This is a super easy way to make your own wreath using your favourite 12 x 12 paper pad and embellishments.

Video is linked below

Simply take a sheet if 12 x 12 paper and cut it in 2 so that it will fit though your die cutting machine of choice.

Using star nesting dies cut a variety of size stars from the card stock.

Once you have cut out the required number of stars place them on your work surface back side up and score from the tip of the star tip straight down to the in dent that resembles a tag. Repeat this process until you have scored the whole star.
Fip the cardstock over so it is pattern side up and fold a star tip into a mountain fold. The indent that resembles a tag becomes a valley fold and you repeat this all the way around the star.

Once you have scored and folded all your stars you can assemble your wreath and decorate as required.


https://youtu.be/HMgI0RTXj8E


Monday, 18 November 2019

Bokeh technique


Hello, today I am sharing how to create a card using the Bokeh effect.

Bokeh is a photographic technique that you may have seen without even realising it and is the way the lens renders out of focus points of light. It is a very pretty effect and can be easily recreated with inks.

I have linked a video below and also a couple if the product I used.

For today's project I have used:

A pre cut card blanc,
A piece of blue card cut to 5 5/8 square
A white peice of card cut to 5 3/8 square
Tim Holtz distress ink colours:
Cracked Pistachio
Carved Pumpkin
Mermaid Lagoon
Peacock Feathers
Lucky Clover
Wilted Violet
White pigment ink
Ink blending tools
Sentiment stamp from Appleblossom and Papercrafter magazine
A scrap price of cardstock to cut my stencil
Round dies that came with my Sizzex Bigshot
Washi tape to hold in place
Wet glue

Method

Position the dies on the scrap peice of cardstock ensuring you have enough room to blend ink without going over any edges and run through your die cutting machine to create your stencil.

Using the distress inks and your stencil create a pattern over your white cardstock square by alternating the size of circle and ink used. Overlap the circles as you go.

When you are happy with your design use white ink and the stencil and create a new pattern over the top of the last one. You do not need to overlap the circles this time and you do not need as many circles, however you do need to vary the intensity of the white as you go.

Once you are happy with your design stamp a sentiment to finish and layer onto the blue piece of cardstock which in turn is adhered to the pre cut card blanc. Stamp a greeting inside your card to finish.

https://youtu.be/nbqdckRKiXo

https://www.craftstash.co.uk/apple-blossom-heartfelt-moments-birthday-a6-stamp-set.html

https://www.hobbycraft.co.uk/white-ink-pad-10cm-x-7cm-x-15cm/567264-1022?query=white-pigment-ink

https://www.craftuk.net/shop/card-envelopes-packs/line-2043-40-6x6-white-cards-envelopes-300gsm/

Tuesday, 12 November 2019

Spectrum Noir Sparkle Ink Card


Hello, today I am sharing a very pretty card I made using Spectrum Noir Sparkle inks as water colours.

There is a sped up video of the process linked below.

For this card I used:

A white pre made card blanc
2 × Lilac matts the first cut to 5 5/8 × 5 5/8" and the second cut to 5 × 5"
Patterned paper measuring 5 3/8 × 5 3/8"
A piece of white cardstock die cut with a stitched edge roughly measuring 4 1/2" square

Stamps used are from Creative Stamping magazine and PaperCrafter

Spectrum Noir Sparkle inks used:

Log fire
Candle light
Glace cherry
Festive spruce
Sleigh bell
Rose quartz
Cosmos
Pink garnet
Moon stone

I also used Create and Craft Hologram Sparkle embossing powder, VersaMark ink and Artnic pigment ink.

Method

I stamped the tulip box in the middle with VersaMark ink and used the Hologram Sparkle to heat embossing the image. I then used the rose stamp in each corner and repeated the process with the heat embossing. I only positioned the corner stamp once as by flipping the card I was able to get an exact mirror image each time.

I used the Sparkle inks as water colours ( they dry nice and quickly) and once the image was completed I matted and layered the coloured cardstock to the front of the card.

To finish I stamped a Happy Birthday sentiment on the front and a verse inside.

https://youtu.be/pVJ87mJSxdo

Tuesday, 5 November 2019

Upright Z fold card


Hello, today I am sharing the upright Z fold card. This is very quick and very easy to make and an interesting twist on the Z fold card.

Video linked below

 Measurements:

Card base cardstock = one piece 12 × 6" and another piece 5 1/4 × 5 1/4"
2 pieces of gold miri card = 5 3/4 × 5 3/4"
1 peice of pattern paper = 5 1/2 × 5 1/2"
1 piece of white card = 5 1/2 × 5 1/2"
1 piece of gold miri card = 5 × 5"
1 piece of pattern paper = 4 3/4 × 4 3/4"
1 piece of gold miri card = 5 3/4 × 2 3/4"
1 piece of pattern paper = 5 1/2 × 2 1/2"

Take the 12 ×6" cardstock and with the 12" side at th top score at 6" then flip the cardstock over and score at 9". Fold and burnish these 2 score line so you have a valley and mountain.

Mount the 5 1/2 × 5 1/2 pattern paper onto a piece of 5 3/4 × 5 3/4 mirror card and adhere to the front of the card leaving a 1/4" boarder.

Stamp a sentiment onto the white card and adhere this to the other piece of 5 3/4 × 5 3/4" mirror card. Afix this to the back of the card.

Take the 5 1/2 × 5 1/2" piece of pattern paper and attach to the miri card which measures 5 3/4 × 5 3/4" then attach these to the front on the card.

Matt and layer you remaining cardstock so that the pattern paper attaches to the miri card and then onto the 5 1/4 × 5 1/4" base card. Place a topper in the centre to complete the front of the card. This than attaches to the 5 1/2 × 2 1/2" pattern paper on the front of the card leaving a small boarder all around.

Using foam pads afix either embellishments or a smaller topper to the top of the card so that the square on the mountain fold catches beneath to hold the card together.

Embellish as required to finish.

https://youtu.be/0CfudLFgeiQ

Monday, 28 October 2019

Gift tags (embossed)

Hello everyone today I am sharing some fun techniques for heat embossing gift tags. This is an alternative way to decorate your gifts/cards this Christmas and all year round.

This is a 2 part series and a video is linked below.


The first tag is cut from red cardstock. Versafine ink was used to stamp the image, I used Hologram Sparkle embossing powder and a poinsettia from Christmas Florals (Creative Stamping issue 76) I then used the "With love at Christmas" sentiment from Silhouette Scenes ( Creative Stamping issue 77) and the same embossing powder to finish.


The second tag is cut from white cardstock and I used a Santa stamp from Crafts Beautiful magazine issue 323. I used Versafine ink to stamp the image and then Heritage Rubber Stamp co embossing powder in white to emboss the image. Once the powder was melted I used a blending brush and a red Stampin Up ink pad to completely cover the tag in ink. Using an old baby wipe I buffed the excess ink off of the embossed image. The result is a gorgeous white image on an inked background.

https://youtu.be/qulPE1uSJ2I

Monday, 21 October 2019

Kraft card inspiration


You will need:

A 6 × 6 card blanc
1 piece of kraft card cut to 5 1/2 × 5 3/8"
1 piece of white card cut to 5 1/2 × 5 3/8"
2 x gold miri card cut to 5 3/4 × 5 5/8"
A tag or topper.
Stamps
Embossing powder, heat gun, embossing ink, glue and embellishments.

Vido linked below.

Adhere yours white card to a piece of miri card, stamp a sentiment and glue inside the card leaving roughly 1/4" boarder.

Ink up you stamps and create a pattern background all over your kraft card. Sprinkle embossing powder over the top, tapping off the excess and setting with the heat gun.
Adhere the craft card to the miri card and attach to the front of the card.
Place the topper at an angle on the card ensuring you can still see the embossed background.

Embellish as required to finish.


Wednesday, 16 October 2019

Bunting card 


For this card you will need:

1 piece of 3.5 × 12" plain cardstock
1 piece of 6 × 6 pattern paper
1 piece of white card
1 piece of Miri card
A set of nesting dies (I have linked the ones I used below)
A die cutting machine
A pencil,adhesive & scissors

Method

Fold the piece of plain cardstock in half and burnish the fold line.
Take a large bunting die and place it onto the folded cardstock ensuring the top of the die is slightly higher than the fold line of your card. Pass this through you die cutting machine.

Select the next size down from your nest of bunting dies and use this to cut a new peice of bunting from the pattern paper and the white cardstock. N. B use the whole of this die on the pattern paper and white card, do not leave any gaps.

Using the same die, put your miri card white side up, place the die on the miri and using your pencil draw round the outside of this die. You need to do this twice. Cut both of these out.
Adhere a piece of miri card to the front of your card and then attach the pattern paper to it. Embellish the front as required.

Adhere the second piece of miri card to the inside of the card with the white cardstock attached on top. Stamp a greeting to finish.

A video tutorial can be found at:

https://youtu.be/mDjrz_L_6Oc

The dies I used are available from here:

https://www.craftstash.co.uk/creative-dies-plus-stitched-pierced-nesting-bunting-die-set.html