Tuesday, 4 January 2022

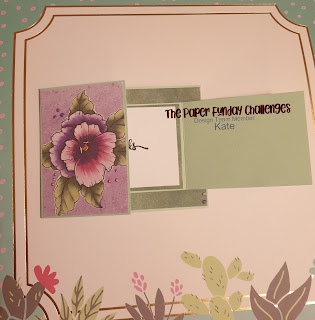
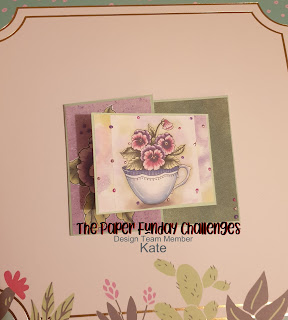
Joyfold card ft Fred-she-said


Happy New Year!!!

Did you make any New year resolutions? Do you think you will stick to them?

I made some and I managed to stick to last years for the whole of 2021!! Check out this video to find out what they were/are!

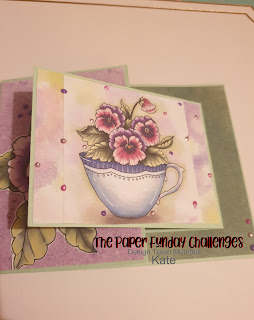
I am starting this year with my favourite fold, the joy fold. This fold makes me so happy, so seemed a perfect way to start my new year! 

It is a year since I applied and was accepted onto http://paperfundaychallenges.blogspot.com/?m=1 and this is my eleventh dt project for them.


This month I am using papers by Fred-she-said which you can find here  https://fred-she-said-store.blogspot.com/2010/02/coloured-pansies-sets.html?m=1

I love the promises of spring held within the focal image and now the days will start getting longer it hopefully won't be long until the trees are budding again and new life starts to burst through.


I have made many joyfold cards before and have a tutorial for a 6 x 6 joyfold card which can be found on the link below

https://youtu.be/UjtVuM16WEI


I hope you all had a wonderful Christmas and that 2022 is better for all of us!

Xoxo

Tuesday, 7 December 2021

Diorama card using In the forest


Hello and welcome!

Today I am sharing how I created a Diorama card using In the forest by Craft Consortium.

This beautiful paper collection was illustrated by Clare Therese and takes us to visit a beautiful forest full of flora and forna and wildlife including bears, raccoons and bunnies. 

I have created a card using the scene stripe in the 12 x 12 paper pad, I have also chosen to use Craft Consortium, Always & Forever glitter card in the shade Lilac. The products will be linked at the end should you wish to pick them up.


I have also created a video tutorial for how to put this card together which you can find here:

https://youtu.be/YjuybqK91d4


Key for measurements:

F - Front

M - Middle

B - Back

To create this card you will need:

F -

 One piece of cardstock 4 1/8 × 9 1/2" 

Score at 2" from each end 

Glitter cardstock - 

Two pieces 1 7/8 × 4" 

One piece 5 1/4 × 4"

Pattern Paper  - 

Two pieces  1 3/4 × 3 7/8"

One piece 5 1/8 × 3 7/8"

M - 

One piece of cardstock 4 1/8 × 7.5"

Score at 1" from each end

Glitter card 5 3/8 × 4"

Pattern Paper 5 1/4 × 3 7/8"

B -

One piece of cardstock 4 1/4 × 9 1/2"

Score at 2" from each end

Glitter card 5 3/8 × 4 1/8"

Pattern Paper 5 1/4 × 4"

Rear of card - 

One piece of glitter card 5 1/4 × 4 1/8"

White card 5 1/8 × 4"


I hope you enjoy this card, please tah me on social media if you give it a go as I love to see what everyone has done. All my Socials are linked below xox

https://www.instagram.com/cardsbykatefletcher

https://youtube.com/channel/UCqZLivtQUb1cG2ahYnhHlLQ

https://www.facebook.com/Cards-by-Kate-111227389688501/

http://cardsbykatefletcher.blogspot.com/?m=1

https://vm.tiktok.com/ZM8A5nryy/

My email:

Cardsbykatefletcher@gmail.com 

Tuesday, 30 November 2021

Christmas crafting with Polkadoodles


Season's greetings friends!


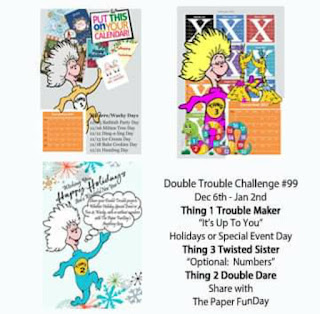
This month http://paperfundaychallenges.blogspot.com/?m=1 have teamed up with  https://doubletroublechallenge.blogspot.com 


With only a few weeks till Christmas its time to post out the last few cards, tweak the bows on the gifts under the tree and relax in front of a Christmas movie in the evening. This truly is the best time of the year!

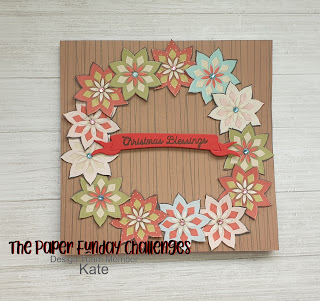
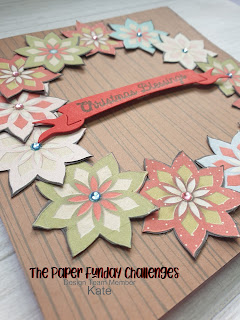
This month Paper Fundays Challenge is kindly sponsored by Polkadoodles, our theme is Christmas and I got to create this beautiful card using https://www.polkadoodles.co.uk/foliage-over-40-winnie-white-christmas-printable-digi-downloads/

I kept this card nice and simple, I used some woodgrain paper from my stash to represent the door and then created the wreath but slightly layering the flowers on top of each other. I added a gem in the center of each flower and finished the card by stamping onto a banner which I die cut from red card stock.


I absolutely love this card and think it turned out beautifully.

Thank you for following along with my crafty journey this year, I can't wait to see what the New Year has on store!!!

Wishing you a very Happy and peaceful Christmas.

Kate

Xoxo

Tuesday, 9 November 2021

Pop out card using Paper Society #24


Hello Crafty friends,


Today I am sharing a belated video creating with Papercraft Society box #24 by Sam Calcott of Made to Suprise.

I made this beautiful pop out card and below are the measurements of card stock if you would like to follow along. 

Card Base:

6 × 12" score at 2,4,6 & 8"

You will need four pieces of pattern paper measuring 1 3/4 × 5 3/4"

You will need one piece of pattern paper measuring 3 3/4 × 5 3/4"

A plain piece of cardstock for your message measuring 3 5/8 × 5 5/8"

For the Pop out piece you will need one piece of cardstock the same colour as your base measuring 7 × 2 3/4" score at 3 1/2"

Lastly you need two peices of pattern paper cut to 3 3/8 × 2 1/2"

You will also require ephemera of your choice to decorate. 

The full video of this card being put together is here https://youtu.be/ZO9jV8A68Uo


My Unboxing video can also be seen using this link https://youtu.be/OYn5NSNdJH0

I hope you enjoy this card as much as I have!

My Socials:

https://www.instagram.com/cardsbykatefletcher

https://youtube.com/channel/UCqZLivtQUb1cG2ahYnhHlLQ

https://www.facebook.com/Cards-by-Kate-111227389688501/

http://cardsbykatefletcher.blogspot.com/?m=1

https://vm.tiktok.com/ZM8A5nryy/

My email:

Cardsbykatefletcher@gmail.com 


Wednesday, 3 November 2021

PaperFundays November inspiration

 Wow! 

How are we in November all ready?!

November in England means fireworks for GuyFawkes night and in recent years Black Friday deals signal the start of the lead up to Christmas!

In the Us it will soon be thanks giving and a time for being grateful and giving thanks. 

This brings to mind family time, Turkey and Pumpkin pie.

My project for this months http://paperfundaychallenges.blogspot.com/?m=1 is a Pumpkin inspired card.


I am very thankful for the team at Paperfundays Challenge who earlier this year gave me, my first ever Dt slot. It has been an amazing year creating beautiful projects for the blog and I can't wait to see what next year holds!

The Pumpkin image was kindly supplied by Artsy Stamper and you can find this and other gorgeous digital images here https://www.etsy.com/uk/listing/719061040/autumns-gifts-stamp-set-for-collage

No matter weather you celebrate Thanks giving or not, take a min to think about what you are thankful for, because even on a bad day we all have something that can make us smile 

Xoxo

Wednesday, 6 October 2021

Simple frame card


This month the  http://paperfundaychallenges.blogspot.com/?m=1 was sponsored by Fred she said, you can find there store here, https://fred-she-said-store.blogspot.com/?m=1 

Our theme was use something purple and Halloween. For this card I used Tonic classic card stock for my base in Amethyst Purple, I then used a purple card stock from Craft Sensations  for my layer and main card front.

The papers I chose were Painterly Pastel papers, a direct link to them in the store is here, https://fred-she-said-store.blogspot.com/2017/05/painterly-pastel-papers.html?m=1

I cut out three large frame dies, one middle frame and several small frames from each paper and kept the inside of each frame for later.

I arranged the three large frames on my cardstock.

I wanted to use the innards of the frames so I went about cutting them to fit inside the various frames. I mixed and matched the colours filling the frames.


Next I started layering different parts of different frames on top of each other at different parts of the design and also double layering for an interesting effect.

Along the bottom I arranged three of the smallest frame interlinking but at an angle. The cardstock below I left its original colour.

I used a die from Spellbinders which cuts and embosses to die cut the banner. I found a piece of purple card in my scraps folder as well as some white and die cut the banner twice.

I fussy cut the center out and stamped a sentiment using my Wiggly words stamps from Creative. The ink I stamped with was Versafine Onyx Black.

I used Cosmic shimmer glue to attach the white layer into the purple banner and attached it to my design with foam pads. I positioned it across the three small frames.

The purple enamel dot is By Craft Consortium and the Gift of giving collection found here, https://www.craftconsortium.com/product-page/the-gift-of-giving-adhesive-pearls

I then mounted the card topper onto my base using foam pads.

To finish I used Nuvo Crystal Drops in the colours: Auburn Pearl, Apple Green and Bottle Green.

I love the effect this card has, it feels like you are looking through a spooky dimension at swirling gasses.

Thank you for joining me again this month, I really appreciate you taking the time to visit my blog.


Happy Crafting and for those that celebrate it, Happy Halloween 

Xoxo
Wednesday, 1 September 2021

Autumnal Crafting


The nights will soon be drawing in, the air will have a fresh nip to it and that can only mean Autumn is on its way!

I love the Autumn  with its crunchy leaves and the warm tones it brings. Always a good excuse for a hot chocolate and crafty evening!

At http://paperfundaychallenges.blogspot.com/?m=1 this months twist is Autumn and I had just the collection to create some inspiration with.

This set from Kanban features everything you associate with Autumn including some delightful sentiments.

For the Deer card I used my Daisy Mae circular nesting dies to cut the base from Centura Pearl cardstock. I then simply layered the images using foam pads.


For the next card I decided to create a tryptic design. I have a video of the process (although not for this particular card) on my YouTube channel here

https://youtu.be/qaBnWv5CYJQ


My autumnal card is 8 × 8" in size. I chose the checked background card from the kit and cut it to fit the card blank.

To make the matt layer under the images and sentiment I simply drew round the design and fussy cut it.

I added gems, orange ribbon and leaves from my stash.

I think both cards turned out great and I am really pleased with them.

Thanks for stopping by.

Happy Crafting 

Xoxo